Boost WordPress Speed
Every 1-second delay in website loading time can have a significant impact on your conversion rate. In fact, it’s been found that a 1-second delay can lead to a 7% reduction in conversions. This might not sound like much, but when put into the context of an e-commerce business, it can mean substantial monetary loss.
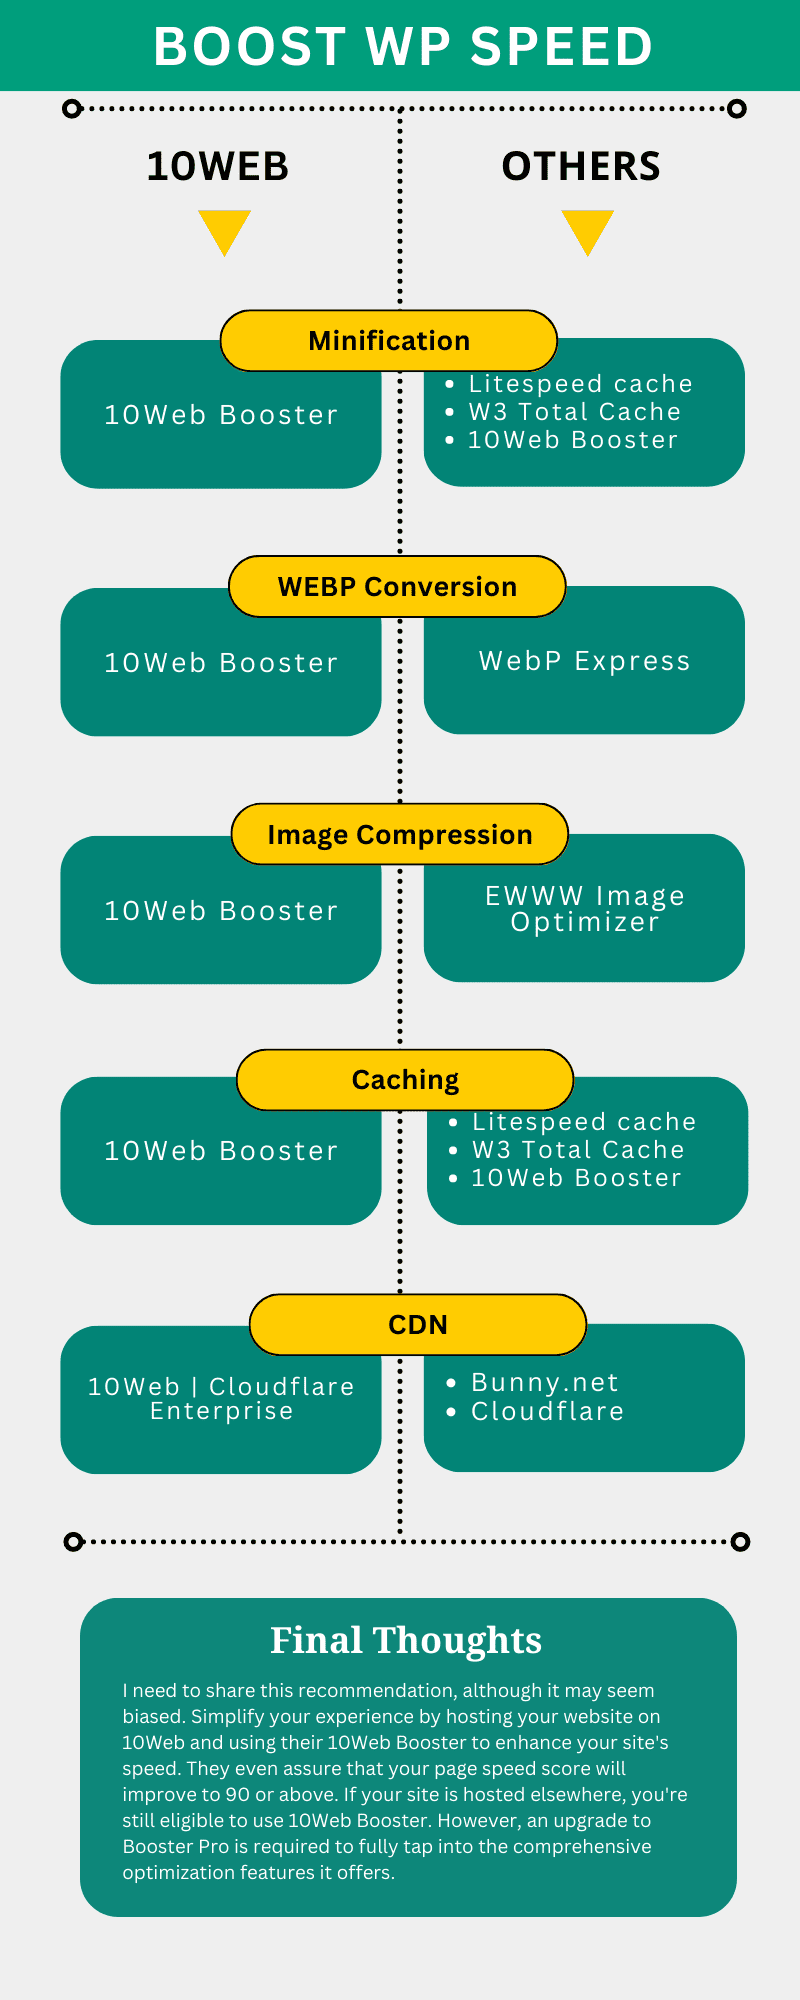
When you use a lot of images, your website tends to slow down, especially in the case of self-hosted websites, like WordPress sites. Nevertheless, if you are using ClickFunnels, Kajabi, Leadpages, or other SaaS web platforms, optimization is commonly already in place, so there’s less to worry about. Therefore, we will discuss how we can optimize websites with numerous images in order to improve website speed.
1. HTML/CSS/JS minification & compression
Your WordPress site is made up of a bunch of codes. Imagine your house with lots of furniture inside. Sometimes, the furniture takes up too much space in the house, and you can’t really move to the kitchen fast enough.
That’s kind of like how HTML, CSS, and JS work. They are all different kinds of instructions that tell your computer how to make a website look and work properly. But sometimes, these instructions can take up too much space, and that makes your website slow to load.So, to fix this problem, we use something called “minification and compression.” It’s like taking all the furniture in your home and rearranging them, so they take up less space.
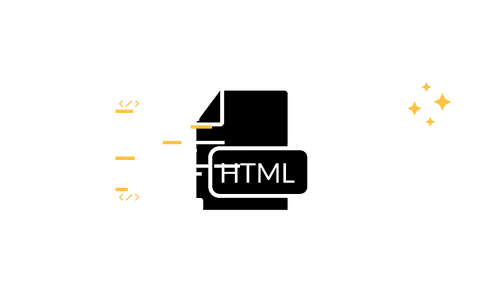
2. Convert images to WEBP
How to use it?
To set up the WebP Express plugin in WordPress, follow these steps:
Step 1: Install the Plugin
- Go to the WordPress dashboard.
- Navigate to Plugins > Add New.
- Search for “WebP Express”.
- Click Install Now on the “WebP Express” plugin card.
- Click Activate once the installation is complete.
Step 2: Configure the Plugin
- After the plugin is activated, go to Settings > WebP Express.
- On the settings page, you have options to configure the plugin according to your needs.
- Operation mode: Select “Varied image responses” unless you want to use it in another mode.
- Destination folder: This is where the converted WebP images will be stored. “Mingled” usually works fine.
- File extension: Usually “Append .webp” is a safe option.
Step 3: Save Changes
- After adjusting all settings to your preferences, scroll down and select Save Changes.
3. Compress image sizes
Compressing image sizes is an important step to speed up a WordPress website. Images are often the largest files on a website, and reducing their size can significantly reduce page loading times. I have seen numerous times a lot of e-commerce owners uploaded their recently captured 2.5 mb photoshoot images into a the product catalogue without compressing it. Compressing images involves reducing their file size without sacrificing quality. This can be done using an online image compression tool such as TinyPNG and compresspng.com.
One question! After you’ve converted your images to WebP format to speed up your WordPress site. Does that mean you can skip the step of compressing your images altogether?
The short answer is no, you still need to compress your images even after converting them to WebP format. While WebP is great at compressing images, it’s not a magic bullet that can fully optimize your images without additional effort. By compressing your images, you can further reduce their file size and make them load even faster. Plus, smaller file sizes mean less strain on your server and a better user experience for your visitors.You can also perform image compression automatically every time a media image file is uploaded to your site using a plugin (Will be revealed shortly!).
4. Utilize Cloud Delivery Network (CDN)

A content delivery network helps websites deliver their content, like pictures, videos or text, to people who want to see it. Instead of sending the content directly from the website’s server to the person’s computer, the content is sent to the closest CDN server or node located closer to your web visitors. Think of it like a Amazon FBA services which store your products in multiple warehouses around the globe and deliver them to your customers in a short period of time.
Let’s say you’re visiting a website that is hosted in the United States, but you’re accessing it from India. Without a CDN, your request for content would have to travel all the way from India to the United States to retrieve the content from the website’s origin server. This can result in high latency and slow loading times, especially if the content is large, such as a video or high-resolution image.
However, if the website uses a CDN, the content will be cached on servers located in India or nearby countries. When you request the content, the CDN will route your request to the closest server, which could be in India or another nearby country. This reduces the distance the content travels, resulting in faster loading times and a better user experience. Unlike all the methods to boost website speed mentioned above, CDN is a paid service. The most affordable & fast CDN service providers out there are Bunny.net & 10Web.
How to use it?
Absolutely, here are the steps to set up Bunny.net CDN on a WordPress site:
Step 1: Register an Account on Bunny.net
- Go to Bunny.net.
- Click on Get Started.
- Fill in your full name, email, and create a password.
- Agree to Terms of Service and Privacy Policy after reading them.
- Click on Create Account.
- You will receive a confirmation email. Find this email in your inbox and click on the link provided to confirm your account.
Step 2: Create a Pull Zone on Bunny.net
- Log into your new Bunny.net account.
- Navigate to “Pull Zones”.
- Click on +New Pull Zone.
- Enter a name for the Pull Zone, enter your WordPress website URL in Origin URL, and choose a Pricing Tier.
- Click Add Pull Zone.
Step 3: Install and Activate BunnyCDN Plugin in WordPress
- Go to your WordPress dashboard.
- Navigate to Plugins > Add New.
- Search for “BunnyCDN”.
- Click Install Now and activate the plugin on your site.
Step 4: Configure BunnyCDN Plugin in WordPress
- Go to Settings > BunnyCDN.
- Enter the hostname provided in your Pull Zone (it should look like yourzone.b-cdn.net).
- Click Save Changes.
Now, Bunny.net CDN should be running on your WordPress site. Browse your site and check if your site’s static contents (images, CSS files, and JavaScript files) URLs are being rewritten to your Bunny.net Pull Zone URL (you can inspect elements on a page to verify).
5. Enable Caching
Website caching is a way to make your WordPress website faster. It works by creating a copy of your website and storing it on your computer or server. When someone visits your website, they get the copy instead of having to wait for the website to load from the server. This makes the website load faster and helps reduce the strain on the server.
There are several kinds of caching available to boost your website speed.
1. Browser caching: This is like a cookie for your website. When you visit a website, your browser saves some of the data so that the next time you visit that site, it loads faster.
Think of it like your browser saying, “Oh, I remember this site! I’ll just grab the stuff I need and we’ll be good to go!”
2. Server caching: When a bunch of people try to visit your site all at once, the server gets overwhelmed and slows down. But with server caching, your server keeps a copy of your website ready to go, so it can quickly serve up that copy to all the visitors. It’s like having a VIP section for your website visitors.
3. Content Delivery Network (CDN) caching: As explained previously, it is like having multiple warehouses for your website. When you use a CDN, your website’s files are stored on servers all around the world. So when someone visits your site, the CDN figures out which server is closest to them and serves up the files from there. It’s like having a warehouse full of your website’s stuff all over the world, so it’s always close by when someone needs it!
6. Remove unused & bloated plugins

Plugins can add all sorts of amazing functionality to your site with just a few clicks. But, they can also slow your site down to a crawl if you’re not careful.
So, how many plugins are too many?Well, let me tell you a story. Back in the day, when I was just a fresh-faced WordPress user, I thought more plugins meant more fun. I loaded up my site with a whopping 40 plugins. As a result, my site was as slow as a snail on a hot day. This is where the stigma of slow WordPress sites comes from – the infamous plugin overload.
Before you go on a plugin-deleting rampage, let’s get one thing straight: not all plugins are created equal. Some plugin developers have clean and efficient code that won’t slow your site down. Others? Not so much. So, how do you know which plugins to keep and which to toss?
The general rule of thumb is to limit yourself to 20+ plugins maximum. But even that number can be too high if you’re not careful. Before installing a new plugin, ask yourself: do I really need this? Will it add real value to my site? And can I outsource this to a SAAS provider and integrate them into my WordPress instead? For example, rather than installing email marketing and CRM plugins, just integrate the site to Mailchimp or Sendinblue which provides better solution and ultimately reducing the number of plugins installed.
In short, plugins can be a powerful tool in your WordPress arsenal, but like all powerful tools, they must be used wisely. So, take a deep breath, assess your plugin situation, and remember: with great power (and great plugins) comes great responsibility.
7. Use a lightweight theme
Let’s talk about themes. Let’s face it, nobody likes a slow site. So, what makes a theme lightweight? Well, for starters, it’s not loaded down with a bunch of unnecessary features and bloatware. It’s sleek, it’s simple, and it gets the job done. And when it comes to lightweight themes that play nice with page builders, two names come to mind: Astra and Hello. Astra is like the Usain Bolt of WordPress themes – lightning-fast and built for speed. Plus, it’s compatible with all the major page builders, so you can customize your site to your heart’s content without sacrificing performance. Then there’s Hello theme developed specifically by Elementor for Elementor users. It’s so lightweight and minimalistic. But don’t let its simplicity fool you – Hello is still a powerful theme that can handle all your page-building needs. So, if you want a fast site that doesn’t skimp on customization options, go for Astra. And if you’re all about that minimalist life, give Hello a try. Either way, you can’t go wrong with a lightweight theme that’s compatible with your favourite page builder.
8. Choose your hosting plan carefully

I think we don’t need to go over this again as it has been covered in the first module. I’m putting it here just to emphasize how important this is 🙂
All in One Solutions to Optimize WP Speed

Hello everyone, feel free to ask any question here 🙂
ada buat servis untuk buat landing page?
some of the video is not working
If you encounter any video playback problems on your mobile device, please consider viewing this course on laptop, or desktop. We are actively addressing issues to enhance the learning experience.
I have reconfigured the streaming zone, kindly let me know if the issue persists
Which is the difference between the 2 services that they provide, one is PAGE SPEED BOOSTER and the other one is PLATFORM, how to know which we should pick.
Hi Raul, good question. Page Speed Booster is for those who host their WordPress website with another hosting provider, while the platform itself includes hosting and Page Speed Booster as part of a single package in their offerings.If you wanted to use the AI builder, you should opt for the platform package 🙂
So if I choose page speed booster it means I have to have 2 hosting
to clarify, speed booster package does not include 10Web hosting, the AI builder is only available for the platform itself