6 Pro Tips for Woocommerce
In this lesson, we won’t cover the basics of WooCommerce such as creating products, assigning categories, and uploading product images. It’s assumed that you can easily figure these out on your own after a quick exploration of WooCommerce. Instead, we’ll focus on the critical tips you need to set up your e-commerce shop before you start selling. These tips will help you optimize your shop and ensure a smooth selling process.
1. Enable Guest Checkout
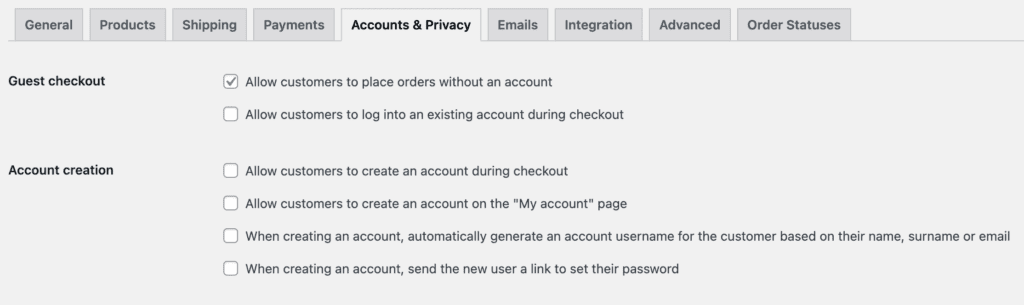
Unless you’re selling digital products, there’s not much benefit in enabling account creation, as it can add unnecessary steps for your customers during checkout. Regardless of whether your customers have created an account on your site, you can still track their Average Order Value (AOV) and retarget them later in your funnel.
2. Set up SMTP Plugin
Another crucial action is ensuring your WooCommerce email is properly configured and ready to go. By default, WooCommerce has settings in place that allow you to edit the email details as needed. However, if your site is hosted on a cheap, shared hosting service, your server IP address is shared with multiple other websites, which can negatively impact the reputation of your emails.
To prevent your emails from ending up in spam folders, it’s important to configure your own SMTP settings. There are several free SMTP providers available, with my personal favourite being Brevo (Formerly known as SendinBlue). Additionally, I use Amazon SES for email marketing, though the setup process can be quite technical.
This tutorial will use Fluent SMTP, the best plugin with premium features, but completely FREE!
3. Customize Woocommerce Email Design
Customizing your order notification email using plugins is a great way to add your brand’s unique touch to the email, making it more memorable and creating a stronger connection between you and your customers.
However, it’s important to keep in mind that most marketing emails usually end up in the promotions tab in customers’ email inboxes. This means that unless your email is a thank you email sent after customers purchase your product, it will likely end up in the promotions tab, where it may not be seen immediately.
To increase the chances of your email being seen and read, it’s important to keep it simple and to the point. Try to include only the most important information, such as the order confirmation number, the date of purchase, and any other relevant details that your customers may need to know. Additionally, consider including a short personalized message that thanks your customers for their purchase and encourages them to reach out to you if they have any questions or concerns.
Please consider visiting the following plugins site, where you can start using them for free:
4. Set up Thank You Page
The thank you page in WooCommerce is a critical part of the customer journey. It’s the page that customers land on after they have completed a purchase on your website.
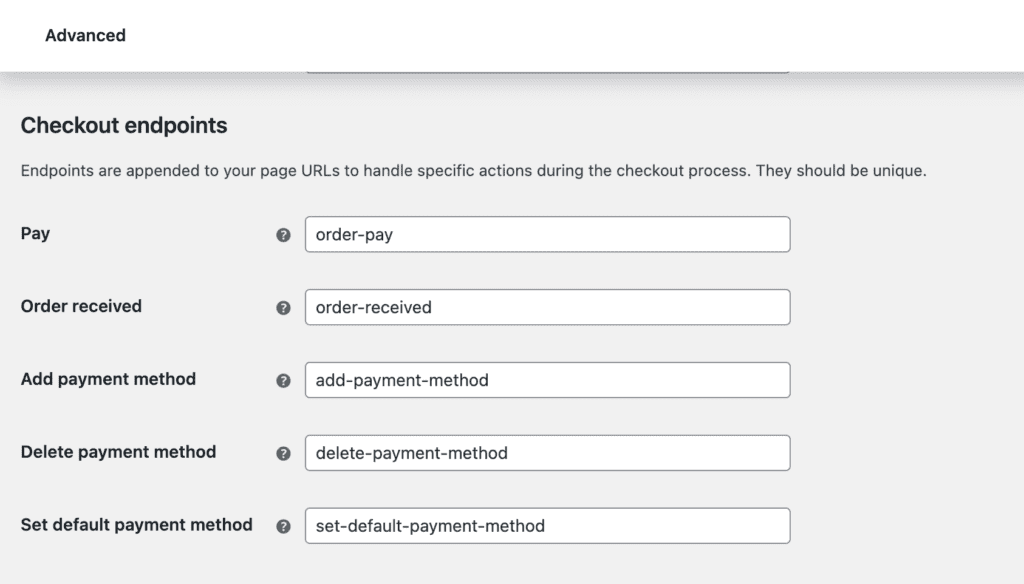
Generally, the link or endpoint for the thank you page can be found below:
Step 1: Log in to your WooCommerce account and navigate to the “Settings” tab.
Step 2: Click on the “Checkout” tab and scroll down to the “Order Received” section.
There are three scenarios on how to customize the thank you page.
Scenario 1: If you’re looking to customize the design of your thank you page in WooCommerce, you usually need an additional plugin. However, if you’ve already purchased Elementor Pro, you can easily set up your thank you page using the following tutorial:
First, navigate to the “Pages” section in your WordPress dashboard and select “Add New”. From there, you’ll be prompted to choose a template. Select the “Elementor Full Width” template and name your page “Thank You”.
Next, open up the Elementor editor by clicking the “Edit with Elementor” button. From there, you can customize the design of your thank you page using the drag-and-drop interface. You can add new sections, change the layout, and customize the text and images to your liking.
This is the best option if you intends to build a typical e-commerce website with multiple product variations.
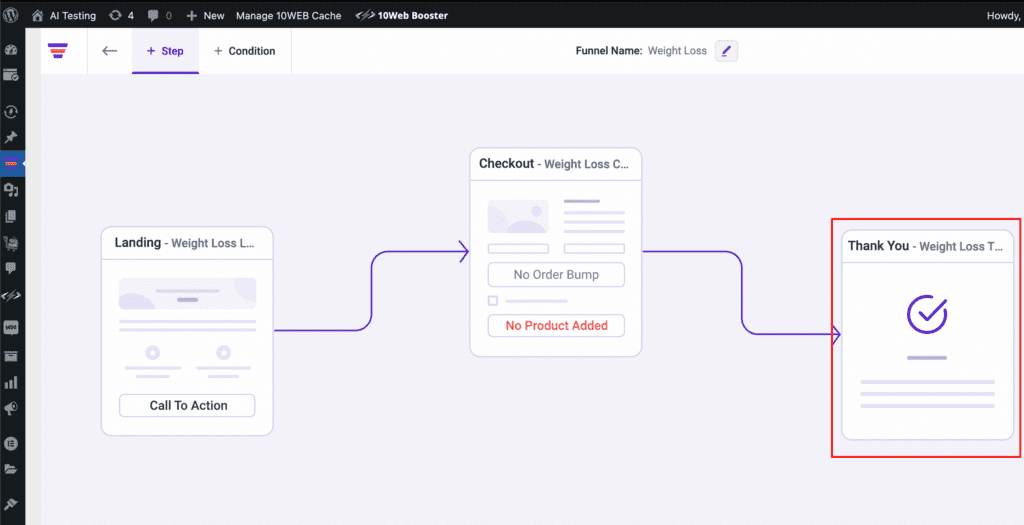
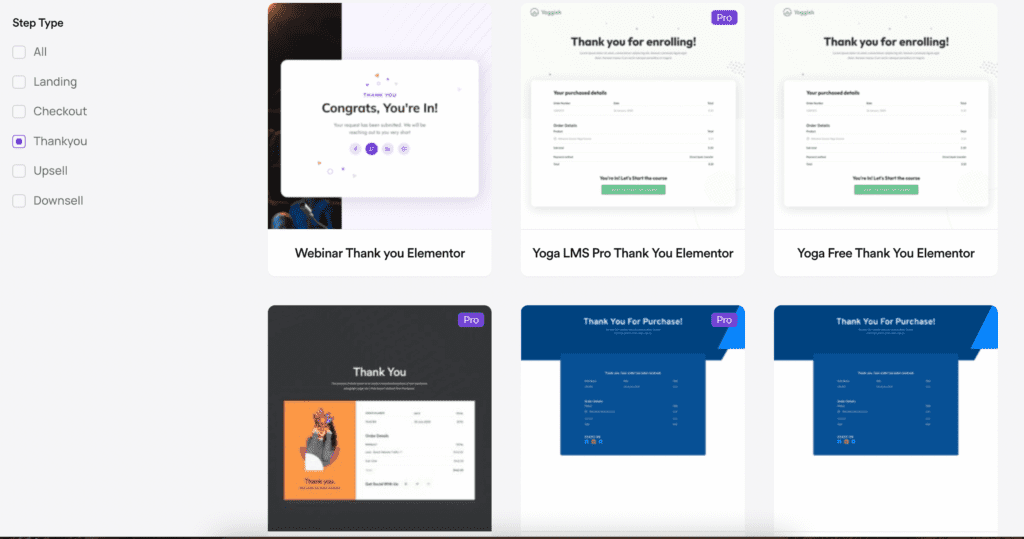
Scenario 2: If you’re working with the free version of Elementor and want to set up a funnel on your website, you can still direct your customers to the thank you page using a plugin like CartFlows or WPFunnels. This will help ensure that your customers have a smooth and seamless experience throughout the entire buying process.
When using these plugins, you can take advantage of the built-in thank you page templates to design a page that fits your brand and provides your customers with all the necessary information about their purchase.
Scenario 3: If you’re looking for a simpler way to customize your thank you page without a page builder, the Thank You Page Customizer Plugin by villa theme offers limited customization options. These plugins may not offer the same level of design customization as using a page builder like Elementor, but it serves its purpose.
5. Legal Pages
Legal pages are a set of pages that contain legal information about your site. These can include:
- Terms and Conditions (T&Cs)
- Privacy Policy
- GDPR Policy
- Cookies Policy
- Refund Policy
- Shipping Policy
- Disclaimer
A good way to think about it is as an online contract between you and your customers: You promise not to do anything bad with their data; they agree not to sue you if something goes wrong. It also helps keep people from getting mad at you when they find out later that their information was misused or sold without their consent (which has happened).
In some countries, compliance with GDPR (General Data Protection Regulation) is mandatory. Specifically, GDPR applies to any organization that collects, processes, or stores personal data of individuals within the European Union (EU), regardless of where the organization is based. This means that any business, whether established within the EU or outside of it, must comply with GDPR if it processes personal data of EU citizens.
If you’re looking for more information on how to create the best legal pages, check out Termly.io

Hello everyone, feel free to ask any question here 🙂
ada buat servis untuk buat landing page?
some of the video is not working
If you encounter any video playback problems on your mobile device, please consider viewing this course on laptop, or desktop. We are actively addressing issues to enhance the learning experience.
I have reconfigured the streaming zone, kindly let me know if the issue persists
Which is the difference between the 2 services that they provide, one is PAGE SPEED BOOSTER and the other one is PLATFORM, how to know which we should pick.
Hi Raul, good question. Page Speed Booster is for those who host their WordPress website with another hosting provider, while the platform itself includes hosting and Page Speed Booster as part of a single package in their offerings.If you wanted to use the AI builder, you should opt for the platform package 🙂
So if I choose page speed booster it means I have to have 2 hosting
to clarify, speed booster package does not include 10Web hosting, the AI builder is only available for the platform itself